Table of Contents
PGP Overview
PGP is a system developed in the early 1990s used to encrypt, decrypt, sign and verify electronic files. It uses a well-understood mathematical concept called public key cryptography, which is used with secure electronic communications.
There are many versions of PGP available. Some are free to use, while others are commercial programs. At the OUAC we use an open-source implementation of PGP called GnuPG. GnuPG is a command-line application.
This site should not be your sole source of information on PGP or GnuPG. It only scratches the surface of what GnuPG can do. The better you understand how GnuPG works, the more secure you are likely to be.
Official website: www.gnupg.org
Please email your questions to IT Support.
Getting Started
Do I need GnuPG?
Although we recommend using GnuPG, other PGP solutions may suffice. If you have already installed an alternative PGP solution, you may wish to initiate a test with the OUAC to determine its compatibility with our version of GnuPG.
How to Install GnuPG
GnuPG is available for most Unix systems (including Mac OS X) and Microsoft Windows.
Installing GnuPG for Unix
To install GnuPG for Unix, either use your system’s package management tool (e.g., RPM for Red Hat Linux and SuSE Linux, APT for Debian) or compile from source.
Note: Depending on the GPG software you installed, “gpg2” commands may have to be run from a folder, where you installed a GnuPG program. If you choose a default location, you will need to switch locations in the command prompt. Type carefully. Almost all command start with two hyphens (e.g., “‐‐”) and not just one (“-”).
Getting Started with GnuPG
To use GnuPG you will need:
- a keypair consisting of a private key
- its corresponding public key, and
- a keyring to keep all of your keys on.
All of these items can be generated with 1 command:
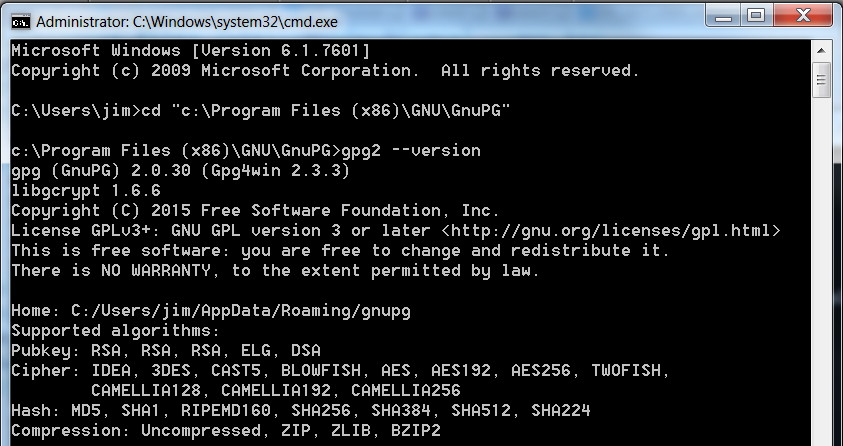
gpg (GnuPG) 2.0.30; Copyright (C) 2015 Free Software Foundation, Inc.
This is free software: you are free to change and redistribute it.
There is NO WARRANTY, to the extent permitted by law. Please select what kind of key you want:
(1) RSA and RSA (default)
(2) DSA and Elgamal
(3) DSA (sign only)
(4) RSA (sign only)
Your selection?
RSA keys may be between 1024 and 4096 bits long.
What keysize do you want? (2048)
Requested keysize is 2048 bits
Please specify how long the key should be valid.
0 = key does not expire
<n> = key expires in n days
<n>w = key expires in n weeks
<n>m = key expires in n months
<n>y = key expires in n years
Key is valid for? (0) 3y
Key expires at 05/04/26 12:05:37 Eastern Daylight Time
Is this correct? (y/n) y
You need a user ID to identify your key; the software constructs the user ID from the Real Name, Comment and Email Address in this form:
“Heinrich Heine (Der Dichter) <heinrichh@duesseldorf.de>”
Real name: you
Email address: you@school.org
Comment:
You selected this USER-ID:
“you <you@school.org>”
Change (N)ame, (C)omment, (E)mail or (O)kay/(Q)uit? O
At this point GnuPG will generate your keypair for you.
Exporting Your Public Key
Command to use to export your public key
To export your public key, use the following command:
c:\Program Files (x86)\GNU\GnuPG>gpg2 -a ‐‐export you@school.org > you@school.org.asc
Replace you@school.org with the email address associated with your key. Replace you@school.org.asc with the name of a file that will hold the exported key.
Your public key is now held in the file you@your.organization.asc. Please upload this file to your ~/toOUAC/ directory on: ssh.ouac.on.ca.
Publishing your Key’s Fingerprint
We now have a copy of your public key, but we need to verify it is genuine by comparing the fingerprint of our copy of your key with the fingerprint that you provide.
To find your key’s fingerprint, run this command:
c:\Program Files (x86)\GNU\GnuPG>gpg2 ‐‐fingerprint you@school.org
pub 2048R/92D8591C 2023-01-17 [expires: 2026-05-01]
Key fingerprint = 0086 8262 9ADC C8AC 216C 0545 CA00 4FC3 92D8 591C
uid [ultimate] you <you@school.org>
sub 2048R/3EFC0953 2020-01-17 [expires: 2026-05-01]
Please copy your fingerprint and phone us or email it to us to let us know that your public key has been uploaded.
Importing the OUAC’s Public Key
Save a copy of the OUAC’s public key to your local computer.
To verify our public key’s fingerprint:
- Add the key to your keyringc:\Program Files (x86)\GNU\GnuPG>gpg2 ‐‐import gpg2023@ouac.on.ca.asc
- Find the fingerprint of your copy of our keyc:\Program Files (x86)\GNU\GnuPG>gpg2 ‐‐fingerprint gpg2023@ouac.on.ca
- Carefully compare the fingerprint you received with the OUAC’s correct fingerprint
The OUAC’s correct public key fingerprint:
EA9F 726E 5C90 1C92 6E29 647C 7956 7BB0 D8BF C6C5
If the fingerprint you received is different from this one, delete the faulty key and contact the OUAC immediately.
Deleting a Key
To delete the key, run this command:
Sign the OUAC’s Public Key
Now that you’ve verified your copy of the OUAC’s public key, sign it.
c:\Program Files (x86)\GNU\GnuPG>gpg2 ‐‐sign-key gpg2023@ouac.on.ca
pub rsa2048/79567BB0D8BFC6C5
created: 2023-02-14 expires: 2026-05-01 usage: SC
trust: unknown validity: unknown
sub rsa2048/2C1848DEFF1FE56D
created: 2023-02-14 expires: 2026-05-01 usage: E
[ unknown] (1). gpg2023 <gpg2023@ouac.on.ca>
pub rsa2048/79567BB0D8BFC6C5
created: 2023-02-14 expires: 2026-05-01 usage: SC
trust: unknown validity: unknown
Primary key fingerprint: EA9F 726E 5C90 1C92 6E29 647C 7956 7BB0 D8BF C6C5
gpg2023 <gpg2023@ouac.on.ca>
Really sign? (y/N)
Really sign? (y/N) y
Encrypting a File to Send to the OUAC
Before you send files to the OUAC they should be signed and encrypted to our public key:
c:\Program Files (x86)\GNU\GnuPG>gpg2 ‐‐armor ‐‐recipient gpg2023@ouac.on.ca ‐‐recipient you@school.org ‐‐output outfile.txt.pgp ‐‐sign ‐‐encrypt infile.txt
Replace outfile.txt.pgp with the name that you wish to use for the encrypted file.
Replace infile.txt with the name of the file that you wish to encrypt.
Depending whether your passphrase is cached, you may get prompted for a passphrase to unlock the secret key for user: “you <you@school.org>”
The -r you@school.org part tells GnuPG to encrypt the file to your public key, allowing you to decrypt your own files. We have found this to be a useful troubleshooting aid, but you can omit it if you wish.
Decrypting a File From the OUAC
Any files in your ~/fromOUAC/ directory on ssh.ouac.on.ca will have been encrypted to your public key. To decrypt them, run this command:
c:\Program Files (x86)\GNU\GnuPG>gpg2 ‐‐verbose ‐‐output outfile.txt ‐‐decrypt infile.txt.pgp
Replace infile.txt.pgp with the name of the file that you downloaded from our server.
Depending on whether your passphrase is cached, you may get prompted for passphrase to unlock the secret key for user: “you <you@school.org>”
GnuPG Without a Passphrase
To effectively script your file encryption and decryption you will need to bypass the passphrase prompt.
There is no truly secure way to bypass the passphrase prompt. The most accepted procedure is to store your passphrase in a local file and provide that file on the command-line. You can do this by using type on Windows or cat on Unix along with the ‐‐passphrase-fd option to GnuPG. You will probably also want the ‐‐batch option.
Bypass the Passphrase on Windows
c:\Program Files (x86)\GNU\GnuPG>type passphrase.txt | gpg ‐‐batch ‐‐passphrase-fd 0
Bypass the Passphrase on Unix
$ cat passphrase.txt | gpg ‐‐batch ‐‐passphrase-fd 0
PGP FAQs
In Windows, I am getting the following error: “gpg” is not recognized as an internal or external command, operable program or batch file. What should I do?
Follow these steps to add c:\Program Files (x86)\GNU\GnuPG to your %PATH% system variable:
- Go to your Start Menu and right-click “Computer” (alternatively, there may be an icon on your desktop)
- Select “Properties”
- Choose “Advanced System Settings”
- Click “Environment Variables” at the bottom
- In the top section called “User variables for” find the path variable and select it
- Click “Edit”
- Without deleting what is already there, add ;”c:\Program Files (x86)\GNU\GnuPG” to the end of the variable value
- Click OK 3 times
It is possible to make keys that never expire, but this is less secure. If someone accesses your private key and its passphrase, you will need to contact everyone who has your public key and tell them to stop using it.